 |
MultiSkin facilitates the data transfer from CorelDRAW (9-X4) to GreatCut by automatically starting GreatCut and also passing on the data that are on the desktop to GreatCut. Depending on the skin it is sufficient to double click or click once on the knife-icon in order to carry out the previously described function. |
.jpg) |
Import and Export via drag & drop for CorelDRAW The Wireframe mode shows the outlines to be cut. |
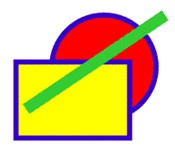 |
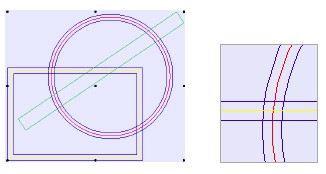
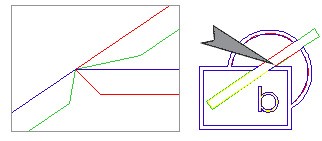
Source graphic with color fill and pencil thickness (8 pt blue) |
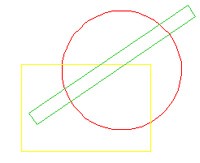 |
Wireframe mode in CorelDRAW shows vectors without pencil thickness. |
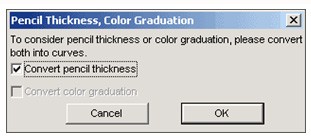 |
The graphic is given to GreatCut using drag & drop function or GreatCut export icon. |
| Result of pencil thickness conversion - cuttable outlines (blue) with original vectors (see wireframe mode above). | |
 |
Enlarged preview |
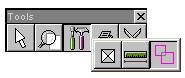
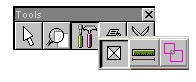
| Select the object and click on the X Cutting |
|
 |
|
| You choose the type of welding: | 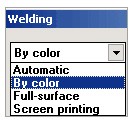 |
| Automatic: Overlapping serifs of fonts are welded. | |
|
|
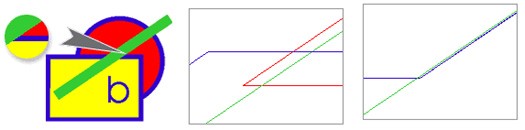
| By Color: The underlying object will be cut larger according to the amount specified to avoid streaks | |
 |
|
| Full Surface: The objects are cut precisely for sticking on shop windows. | |
 |
|

 |
|
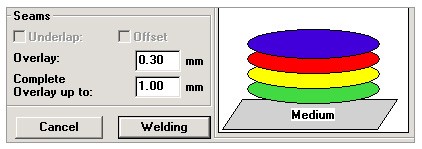 |
Specify the amount of Overlap to avoid streaks in the joins. |
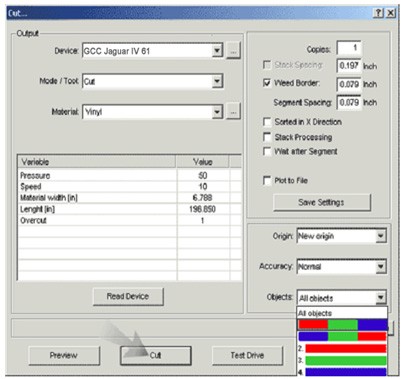
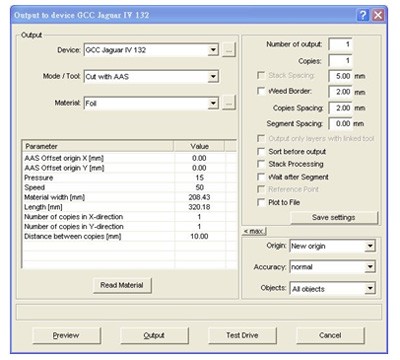
You select the machine, mode, number of copies ...... and click on Cut.
 |
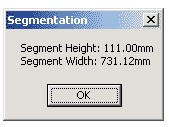
The Use of Material is shown in sq. m and running meters in the Cutting Preview status line. |
 |
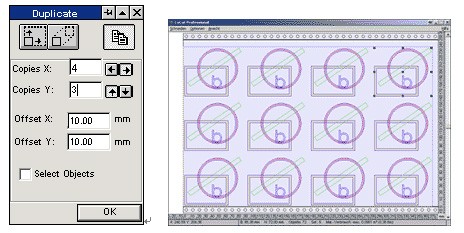
The amount of material used is minimized by rotating and moving the objects. You can specify the distance between the objects to be optimized. |
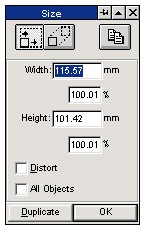 |
The object can be enlarged proportionally or disproportionally. |
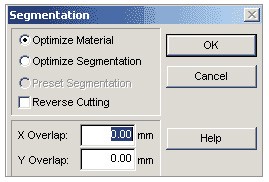 |
When the maximum width of foil is exceeded, GreatCut activates the sectioning command. |
 |
The object is divided into segments of equal size. Each segment can be cut separately. The segments can be moved individually and also positioned exactly. You can deactivate individual segments by clicking on them. The most recent setting will be saved automatically. |
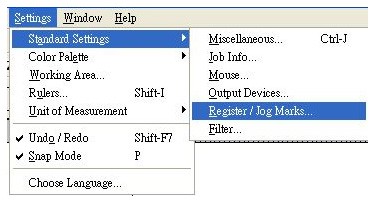
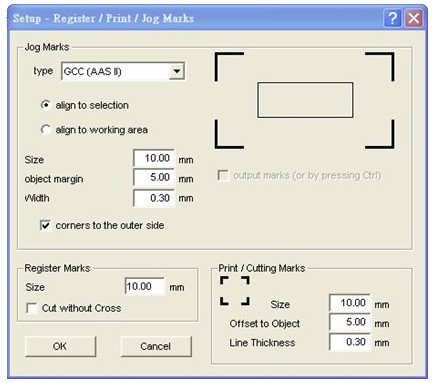
 The register marks are set by using the mouse.
 In order to enable the exact assembly of foil colors, the register marks are cut independently of the used color, at the same place on the foil.
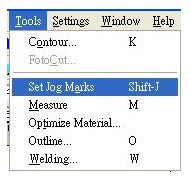
The jog marks function is used in order to create Sticker. Printed vinyl with jog marks is put in the cutter. The numbers of duplicates are cut with a contour.
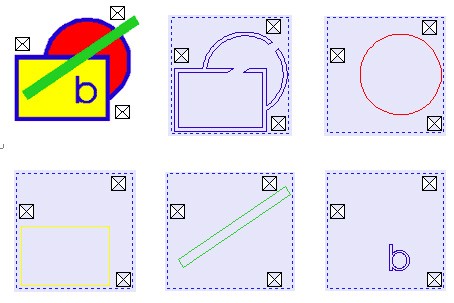
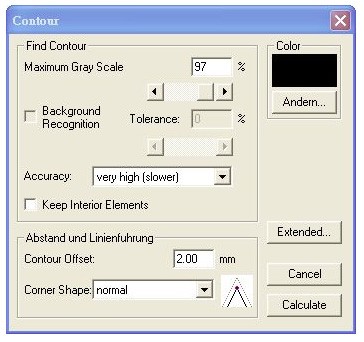
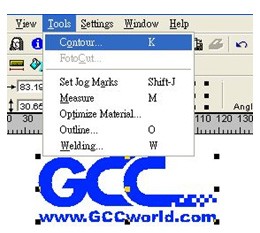
Load Bitmap and create contour with contour function. |
 |
 |

 |
 |
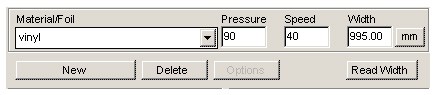
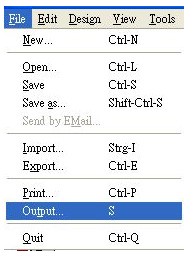
Setup for specific plotter |
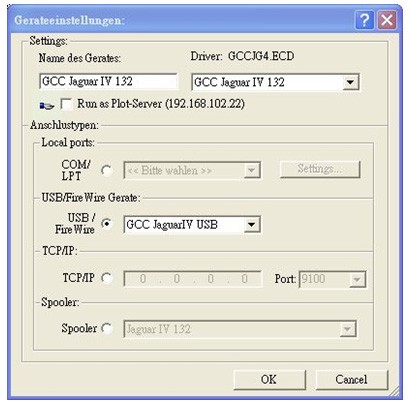 |
Driver selection is done by selecting your cutter in the driver list box on the right side. The plot server option displays your local IP address, which has to be entered as TCP/IP address in the clients. Detailed configuration Local ports and USB devices connect the selected device to your PC. The settings button allows to configure baud rate, data bits, etc.. Over the TCP/IP option you can send your plot data to an external network print server device. The spooler option allows selecting a network printer (generic text only). Via this spooler you can send raw data to any device you like. |
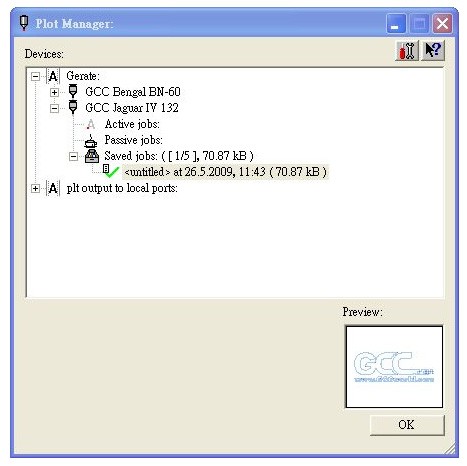 |
The clipart.job is now being cut. In the preview you see a thumbnail of the cutting job. With drag & drop to 'Passive jobs' you can deactivate the running job. All cut jobs are listed under the 'Saved jobs' tree and can be reactivated by dragging them to the 'Active jobs' tree. |
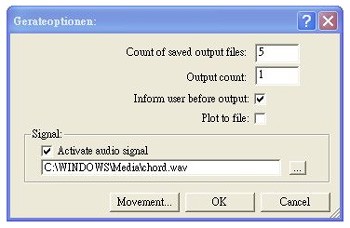 |
You can define specific output options for each device. 'Count of saved output files' defines the length of the history of saved jobs. Output count defines how often active jobs are given out from the device. |
 |
This window shows the distance each tool of the device has covered since last reset. |
Figure 4: Summary of tool movements
What is POWERweed?
It can be seen in the figure 1 below that the objects to be cut are only surrounded by a weeding frame.
Especially when the objects are small, this is often insufficient for weeding them quickly and easily.
In the GreatCut cutting preview you have three possibilities of using this feature.
The POWERweed feature of GreatCut simplifies the weeding act by adding horizontal or vertical weeding lines.
These additional weeding lines besides the weeding frame leave out the cut vectors of the objects. (See fig. 2 below)
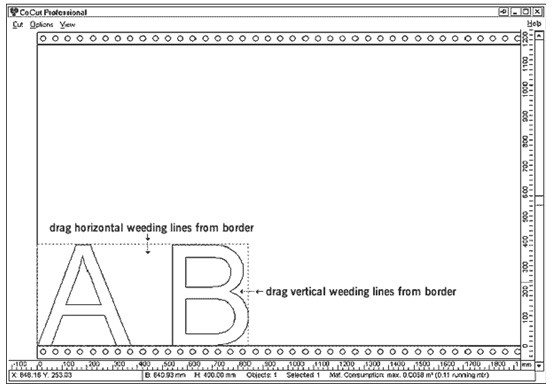
Figure 1: Adding Horizontal/Vertical Weeding Lines
‘H’ adds a horizontal, ‘V’ a vertical weeding line. The weeding line is set automatically in the middle of the width or height.
The second weeding line is set in the middle of the half, the next one in the middle of the quarters and so on.
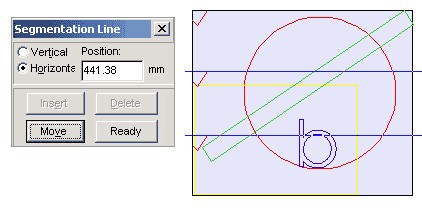
In the figure below you can see how a cut job is prepared for cutting with segment lines.
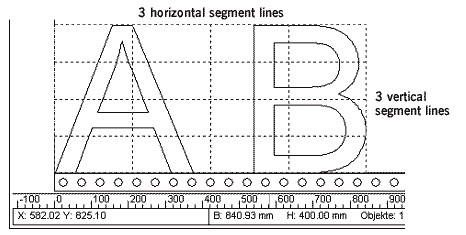
will be divided at the centre by further segment lines.
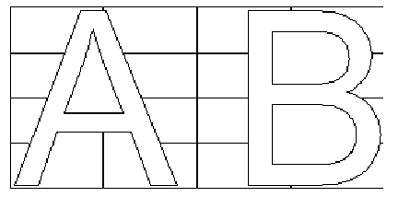
Figure 3: This Is To Be Cut in vinyl!

| Line width upwards | Line width downwards |
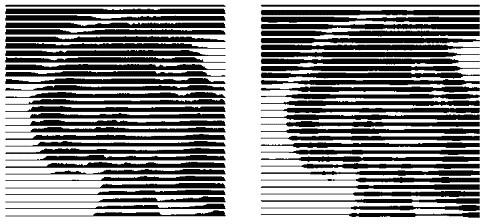
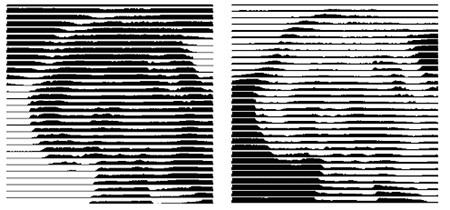
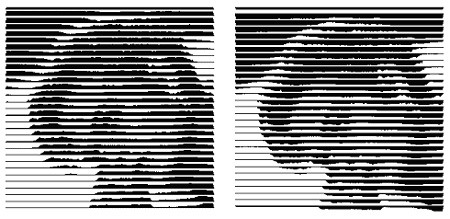
Even small modifications of the values produce very different results.
The lines are thickened at the ends so that the image can be weeded more quickly.
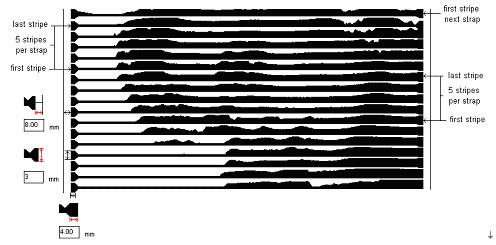
You can specify the width of a strap in this box.
You can specify the thickness of a strap in this box. Strap Offset to Weed Border
You can enter the offset to the weed border in this box.
In this box you can enter the number of stripes that each strap should contain.
The bitmap dimensions in pixels and mm and the probable Number of Objects are displayed beneath these fields.
Lines, Rhombuses, Circles, Squares, Single Rhombuses, Single Rectangles and Spirals.
It is not easy to judge the quality of the result from the screen display. Therefore you should print out the result so that you can assess it accurately and don‘t run the risk of wasting expensive vinyl
- Compatible with the following file formats: *.CMX, *.CCJ, *.JOB, *.AI/EPS, *.PLT, *.TIF.
- It is able to scan complete clipart CD-ROMs in one pass and display the contents afterwards without inserting the CD-ROM.
- File search is supported by using search paths or search masks.
- Thumbnail size can be changed by simply pressing + key or - key.
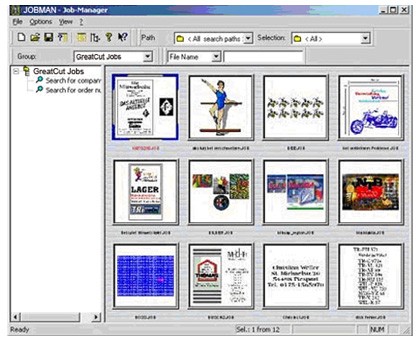
Figure: Job Manager Window with search path tree, search masks and thumbnails
djustments and mistakes reserved.